GuideMaster X1: Adjusting Blade Height for Precision Cuts
Mastering blade height adjustment on the GuideMaster X1 is the single most impactful technique for achieving splinter-free, professional-grade cuts. Whether you are crosscutting hardwoods, ripping plywood, or dialing in a dado stack, proper blade exposure minimises tearout, reduces kickback risk, and extends blade life. This guide covers everything from the correct height for each material to fine-tuning with the Saw Pilot digital readout.
What Is the Correct Blade Height for Different Materials?
Blade height is measured from the top of the saw table to the highest tooth tip. A common rule is to expose just enough blade to clear the workpiece thickness plus one full tooth. For the GuideMaster X1, that translates to roughly 1/4 to 1/2 inch above the material. Here is a quick reference:
- 3/4-inch plywood (18 mm): Set blade to 1 1/8 inches above the table.
- 2×4 lumber (38 mm): Set blade to 1 1/2 inches above the table.
- 1/4-inch veneer (6 mm): Set blade to 7/16 inch above the table for minimal tearout.
- Dado stacks (up to 13/16 inch): Set blade to 1/4 inch above the top of the workpiece for blind dadoes.
Always test on scrap first, especially when using a new blade or material thickness.
How Do I Use the Saw Pilot to Set Blade Height Precisely?
The GuideMaster X1’s Saw Pilot digital display provides real-time blade height readouts to within 0.01 inch. To use it:
- Power the Saw Pilot by pressing the battery indicator button (see GuideMaster X1: Replacing the Saw Pilot Battery for Cordless Operation for battery checks).
- Turn the height wheel clockwise to raise, counterclockwise to lower.
- Watch the digital display; when it matches your target height, lock the wheel with the locking lever.
- For dado stacks, use the “Dado Mode” (press and hold the display button for 3 seconds) to view stack thickness rather than tooth height.
The Saw Pilot eliminates guesswork and ensures repeatable setups across multiple cuts.
What Are the Dangers of Incorrect Blade Height?
| Blade Height Setting | Risk | Potential Consequence |
|---|---|---|
| Too low (barely cutting through) | Burning, tearout, kickback | Workpiece catches, blade overheats, poor finish |
| Too high (excessive exposure) | Kickback, personal injury | Workpiece lifts, blade catches fingers, severe accidents |
| Inconsistent between cuts | Uneven results, waste material | Parts don’t fit, rework required |
| Wrong for dado stack | Blind dado depth error | Joint failure, visible gaps |
Always use the Saw Pilot to verify height before each cut, especially after changing blades or materials.
How Do I Adjust Blade Height for Tearout-Free Plywood Cuts?
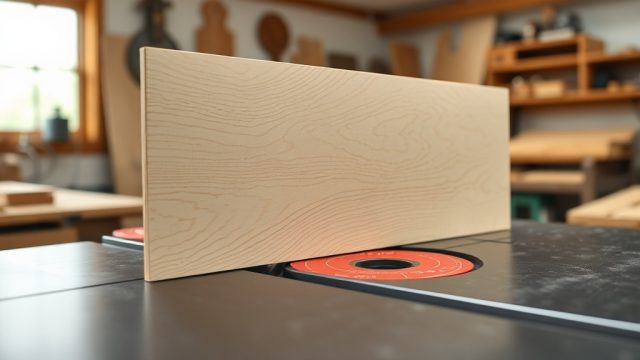
For plywood, the key is minimal blade exposure to reduce splintering on the exit side. Set the GuideMaster X1 blade height so that no more than 1/8 inch of tooth is above the material. Pair this with a zero-clearance throat plate (available as an aftermarket accessory) and a sharp crosscut blade with 60+ teeth. For deeper guidance, see GuideMaster X1: How to Cut Plywood Without Tearout.
How Does Blade Height Affect Dado Stack Performance?
When using a dado stack, blade height determines the depth of cut for grooves and tenons. For a 1/2-inch-deep dado in 3/4-inch material, set the blade height to 1/2 inch above the table, not 1/2 inch above the workpiece. The Saw Pilot’s Dado Mode simplifies this by reading stack thickness. If you encounter chattering or uneven cuts, first check blade height, then consult GuideMaster X1: Troubleshooting Common Dado Stack Issues.
What Owners Say About Blade Height Accuracy
Users consistently praise the Saw Pilot for removing guesswork. One woodworker noted: “With my old saw, I’d spend five minutes checking height with a ruler. The X1’s digital readout gets me within 0.002 inch right away.” Another reported: “I upgraded the rip fence (see GuideMaster X1: Upgrade to an Aftermarket Rip Fence for Ultimate Accuracy) and combined it with precise blade height – my dadoes now fit like a glove.” Common feedback includes that the locking lever could be stiffer, but most find it adequate once tightened fully.
How Often Should I Check My Blade Height Calibration?
Check calibration every 20 hours of cutting or whenever you change blades. The Saw Pilot can drift over time due to vibration. Use a machinist’s ruler to measure the blade’s highest tooth above the table; compare with the digital readout. If off by more than 0.01 inch, adjust the offset in the Saw Pilot settings (menu > calibration). For daily checks, follow the GuideMaster X1: Daily and Pre-Cut Quality Control Checklist for Consistent Results.
Frequently Asked Questions
1. Why does my blade height change during a cut?
The height wheel lock lever may loosen over time. Tighten it fully at each setup. Also, check that the Saw Pilot battery is not low (replace per GuideMaster X1: Replacing the Saw Pilot Battery for Cordless Operation) as low voltage can cause display errors.
2. What is the maximum blade height on the GuideMaster X1?
The X1’s maximum blade height is 3 1/2 inches above the table, suitable for a 10-inch blade cutting through 2 1/2-inch material at 90 degrees. For bevel cuts, reduce height by the bevel angle.
3. How do I set blade height for a bevel cut without the Saw Pilot?
If the Saw Pilot is unavailable, use a protractor and measure from the table to the blade tip at the highest tooth. A 45-degree bevel requires about 1/3 less height than a 90-degree cut for the same material thickness.
4. Can I use the Saw Pilot to set blade height for miter cuts?
Yes, but the display shows height perpendicular to the table, not along the miter angle. For a compound miter, set height based on material thickness and test cut on scrap.
5. Does blade height affect dust collection?
Yes. Higher blade exposure increases dust thrown toward the operator. For best dust collection, keep the blade height at the minimum necessary and ensure the dust port is clean (see GuideMaster X1: Clean and Lubricate for Smooth Operation).
6. What is the cost of a replacement height adjustment wheel?
OEM replacement parts cost around $45 USD. Aftermarket upgrade kits (e.g., fine-thread wheel) are available for $28 USD and provide finer adjustment control.