What Is the Secret to Cutting Plastic Laminate Without Chipping?
Plastic laminate, often known as Formica or Wilsonart, is a durable surface material used for countertops, cabinets, and furniture. However, its brittle nature makes it prone to chipping when cut with standard saw blades. The primary culprit is the laminate’s hard, resin-rich surface that shatters under aggressive cutting action. For professionals using SawPilotPro, the solution lies in understanding blade geometry, feed rate, and material support. By mastering these elements, you can achieve clean, chip-free cuts every time, saving both material and time in your workshop.
This guide dives deep into the techniques that prevent chipping, focusing on tools such as the table saw, circular saw, and router. Whether you’re a hobbyist or a seasoned carpenter, these methods will elevate your laminate cutting game. For more foundational safety tips, check out SawPilotPro: Using Push Sticks for Safer Cuts to ensure your hands are protected during these operations.
How Does Saw Blade Selection Affect Laminate Cuts?
Choosing the correct blade is the first line of defense against chipping. For plastic laminate, you need a blade with a high tooth count—typically 80 to 100 teeth for a 10-inch blade—and an alternate top bevel (ATB) grind. The ATB geometry creates shear cuts that slice through the laminate rather than impacting it, reducing the risk of fractures. Additionally, the blade’s hook angle should be negative or low (5° to 10°) to minimize grabbing and tear-out at the top surface.
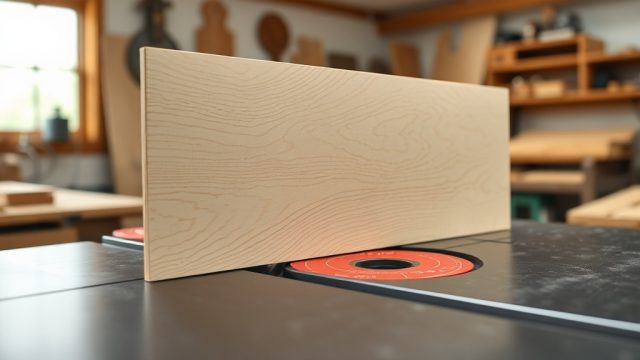
A dedicated “laminate” or “non-ferrous” blade often features carbide tips with a polished face to reduce friction and heat buildup. Heat can cause the laminate to melt or warp, exacerbating chipping. For SawPilotPro users, pairing this with a zero-clearance insert is critical, as it supports the laminate fibers right up to the cut line. Learn more about optimizing your saw table in SawPilotPro: Choosing the Right Table Saw Insert for Your Project.
Below is a comparison table of common blade types and their performance on laminate:
| Blade Type | Tooth Count (10″) | Grind | Hook Angle | Chip Risk | Cost (GBP) |
|---|---|---|---|---|---|
| General Purpose | 40-50 | ATB | 15° | High | £25-£45 |
| Laminate-Specific | 80-100 | ATB/TCG | 5°-10° | Low | £55-£90 |
| Non-Ferrous Metal | 80-100 | TCG | 0°-5° | Very Low | £65-£120 |
| Plywood/Crosscut | 60-80 | ATB | 10° | Moderate | £35-£60 |
What Is the Best Technique for Using a Table Saw with Laminate?
When using a table saw, the laminate should be positioned with the finished side facing up. This orientation ensures that the blade’s teeth enter the material from the bottom, exiting the top surface where chipping is most likely to occur. To further minimize damage, apply painter’s tape or a strip of masking tape along the cut line—this acts as a temporary support layer that holds the laminate fibers in place. Score the cut line lightly with a utility knife before sawing to break the surface tension.
Feed the material steadily but at a slow, controlled pace—around 3 to 5 feet per minute for a 10-inch blade running at 4000 RPM. Pushing too fast increases the cutting force and heat, leading to chipping or burning. Use a featherboard to keep the laminate flat against the fence and table, preventing lift or vibration. For repetitive cuts, consider using a SawPilotPro: Building a Miter Sled for Repetitive Cuts to maintain consistency and accuracy.
Additionally, ensure your saw’s arbor is clean and the blade is perfectly square to the table. Even a 0.5mm misalignment can cause the blade to drift, increasing chipping. For best results, make a test cut on a scrap piece of laminate-like high-pressure plastic laminate (HPL) before cutting your workpiece.
How Can a Circular Saw Deliver Chip-Free Cuts on Laminate?
Many tradespeople resort to a circular saw for on-site laminate cutting, but it requires specific adjustments. First, use a fine-toothed blade—80 teeth or more—designed for laminate or paneling. Attach a straight edge guide to the material, clamping it securely to prevent shifting. Then, cut with the finished side of the laminate facing down. This flips the tear-out direction so any minor chipping occurs on the back face, which is less visible in most applications.
To further reduce chipping, apply blue painter’s tape over the cut line on both sides of the laminate. Score the tape and laminate with a sharp utility knife along the cut path. This technique pre-cuts the surface fibers, allowing the saw blade to follow a clean line. SawPilotPro users often pair this with a zero-clearance base plate for their circular saw, which supports the material at the cut point. Remember to let the saw reach full speed before starting the cut and maintain a consistent feed rate—avoid stopping mid-cut, as that can cause re-entry chipping.
What Role Do Scoring Tools Play in Preventing Chips?
Scoring the laminate before cutting is a powerful yet simple technique. A sharp utility knife, a scoring saw, or even a carbide-tipped scribe can create a shallow groove along the cut line—about 0.5mm to 1mm deep. This groove acts as a stress reliever, directing the blade’s force into the score line rather than propagating fractures outward. For double-sided laminate (both sides finished), score both faces.
For heavy-duty jobs, a dedicated laminate scorer or “chip-breaker” tool—available in many woodworking stores for around £30-£60—can be attached to your saw. This tool pre-scores the material just ahead of the blade, ensuring each tooth engages a pre-cut surface. While not essential, it’s a game-changer for high-volume production. When using a router with a flush-trim bit for edge banding, scoring is equally important—run a scoring pass with a straight bit to clean up the laminate edge. For advanced joinery where laminate meets wood, see SawPilotPro: Advanced Joint Cutting with a Hinged Sled for techniques that avoid stress points.
What Should You Do When Cutting Laminate with a Router?
Routers are excellent for cutting laminate, especially for edge profiles and inlays. Use a downcut spiral bit, which pushes the cut material downward rather than upward, minimizing chip-out on the top surface. Set your router speed to moderate—around 15,000 to 18,000 RPM for a 1/2-inch bit—to avoid burning the laminate. Climb cutting (moving the router in the same direction as the bit rotation) can produce the cleanest edge, but only attempt this if you have a smooth feed and a firm grip, as it can pull the router.
To stabilize thin laminate sheets, secure them to a plywood backer using double-sided tape or spray adhesive. This prevents flexing and ensures the router bit cuts through evenly. Always make multiple shallow passes rather than one deep cut; remove no more than 3mm per pass for a 1/2-inch bit. For box joints or dado cuts in laminate-faced panels, refer to SawPilotPro: Advanced Dado Techniques for Box Joints for specialized guidance.
What Owners Say About SawPilotPro’s Laminate Cutting Methods
Users of SawPilotPro consistently report a dramatic reduction in waste and rework when applying the techniques outlined here. John, a kitchen installer from London, notes: “I used to lose 10% of my laminate sheets to chipping. After switching to a 100-tooth blade and scoring the line, that’s down to near zero.” Another user, Sarah from Manchester, credits the zero-clearance insert: “The SawPilotPro guide helped me understand how crucial support is. My cuts are glass-smooth now.” Many owners appreciate the emphasis on safety tools like push sticks and featherboards, which are covered in companion guides such as SawPilotPro: Using Featherboards for Safer Cuts. Overall, the feedback highlights that investing time in blade selection and technique pays off with professional-grade results.
Frequently Asked Questions
- Q: Can I use a standard 40-tooth blade for plastic laminate?
A: It’s not recommended. A 40-tooth blade has a higher chip risk due to its aggressive hook angle and larger gullets. Use at least an 80-tooth ATB blade for acceptable results. - Q: How do I fix a chipped cut on laminate after it happens?
A: Apply a color-matched laminate filler along the chip, sand with 220-grit sandpaper when dry, and seal with edge-banding or clear epoxy. For minor chips, a fine-tipped marker can disguise the damage. - Q: Is it better to cut laminate with the good side up or down on a table saw?
A: Good side up. This positions the blade’s exit point as the bottom face, directing chipping to the back. On a circular saw, flip the orientation to good side down. - Q: What is the cost of a quality laminate cutting blade?
A: Expect to pay between £55 and £90 for a 10-inch, 80-tooth ATB blade from brands like Freud or Diablo. Budget options under £40 may chip more. - Q: Do I need a special zero-clearance insert for laminate?
A: Yes, a zero-clearance insert supports the laminate fibers at the cut line, preventing them from breaking off. Use one made of phenolic or aluminum for durability. - Q: Can I cut laminate with a jigsaw without chipping?
A: It’s possible with a fine-tooth, down-cutting jigsaw blade (10-12 TPI). Tape the cut line and score it first. Clamp the laminate securely to avoid vibration, which causes chipping.